Wildlife Photography Tips: Part 1
I'm in my late 60s; the following photo tips are grounded in decades of working with wildlife. Early images were captured with large and medium format cameras. 35mm film was reserved for telephoto work. Tips are organized in chronological order and will reflect the type of equipment used at that time.
My first digital camera was a Sony Mavica MVC-FD7 followed by a Nikon 990; a Fuji S2 (Nikon lenses) and a Kodak DCS Pro SLR/n with a full frame sensor.
A Konica Minolta 7D purchased in early 2005 was the first digital camera that yielded results close to that of 35mm film. When Sony purchased Konica Minolta in 2006, the game changing Sony Alpha series emerged from the 7D's strong roots.
Sharie's interest in photography began in the 70s. She was an active member of the Regina, Saskatchewan Photo Club. Photos taken when she was living in Africa (late 70s) reflect her gifts of patience, perseverance and an eye for compelling composition.
We sincerely hope our photo tips will help you attain your goals.
David Krughoff
Note: We'll also be adding our experiences with current mirror-less cameras.
Image stabilization
I’ve witnessed the introduction of new formats of film cameras and more recently—digital cameras. In every instance the majority of professionals have opted (often reluctantly) for portability and convenience. During 2005 after using digital cameras for 5 years, I returned to 35 mm film. My digital cameras and Nikon lenses were sold with what turned out to be short-lived resolve.
A returned to the digital format soon followed, when Konica Minolta introduced the 7D. This camera features sensor-based image stabilization. Sony bought Konica Minolta shortly after the 7D was released and the Sony Alpha series was born.
I never use a tripod, unless my 13-pound, Sigma 300-800 mm lens is attached to my camera or I'm working from a blind. The average time that I have to capture an image is less than 10 seconds and often less than 5 seconds! Freedom from the need of a tripod has increased my success rate ten-fold.
A monopod with a tilt head is often used. Mine has a trigger-release that allows me to adjust the height with one hand while continuing to operate my camera with the other. Horizons can be kept level by leaning the monopod left or right.
Two other advantages spring from the fact that image stabilization allows me to utilize slower shutter speeds.
1. Lower shutter speeds enable me to shoot in lower light, while continuing to work at relatively low ISO settings. This produces images with less noise.
2. Lower shutter speeds allow me to use smaller apertures (larger F-stop numbers). Consequently I always have the option of adding considerable depth of field (background detail) when I believe this will improve a composition.
Along with image stabilization, I use proven techniques in order to reduce camera shake. These include, elbows against my sides along with even steady breathing—exhaling slightly as I release the shutter. While using techniques such as these, you can experiment and find out how far you can push the limits of your camera’s image stabilization!
The photograph below was taken with a Konica Minolta 7D in low light, handheld.
Exposure compensation
If you are tired of your images being spoiled by over-exposures, then these tips are for you!
Automatic exposure is a feature of modern film cameras, point and shoot digital cameras and digital SLRs. It may be accurate enough for casual snapshots. But overexposures and underexposures are the norm when manual exposure compensation is not understood and utilized. I think of auto-exposure as a convenient light meter and nothing more. It is a baseline from which I make the fine adjustments that are necessary for accurate exposures.
When subjects like water, bright clothing and white birds end up with garish “blown highlights”, these areas are overexposed.
Slight underexposures can easily be corrected in your editing software. In contrast, overexposures cause unsightly flaws that cannot be corrected. Even if you are shooting in “RAW” format, detail in “blown highlights” cannot be recovered because detail was not recorded.
I have my digital SLRs set up to automatically display my last exposure on the LCD screen, for 10 seconds. In the menu, I also select the display preference that pinpoints overexposed areas by causing them to “blink” on the LCD screen. Digital SLRs all have these features and some manufacturers are including them in their point and shoot cameras.
Based on years of experience, I can usually assess the available light, my subject and its background accurately and then adjust the exposure compensation in advance. But automatic image review allows me to confirm correct exposures or quickly change the compensation setting if necessary. The use of automatic image review will allow you to quickly produce professional results.
To become familiar with the exposure compensation controls on your digital camera, please read your camera’s manual. If you have a point and shoot camera, the controls may include a button that you need to press in combination with a toggle control. On professional digital SLRs, exposure compensation can be assigned to the front or rear control dial.
Please keep in mind that if you have bright overexposed areas in you image, then you must adjust the exposure compensation in the minus direction (less light). If your image has an overall dark appearance you will need to make your exposure compensation in the plus direction (more light).
With practice, adjusting the exposure becomes a comfortable routine and you will be able to give your full attention to composition.
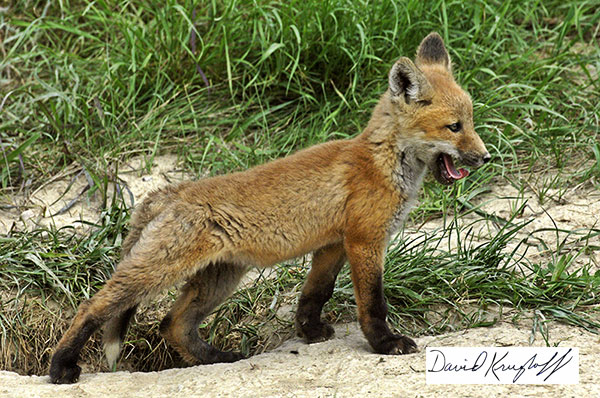
Photos of red fox are often overexposed because of the dynamic ranges of their coats. The first image was shot, 1/3 stop under the optimum exposure. It was a partly cloudy day and the amount of light was constantly changing. I wanted the extra protection of this setting. The first image is as-shot. The second version has +2-tenths of exposure compensation added in Photoshop CS.
Please note: if I had not chosen to shoot in the field at minus 1/3 stop the image would have been overexposed. The image would only stand plus 2 tenths of additional exposure during processing. When I attempted to add plus 3 tenths of exposure in Photoshop, highlights were overexposed. Overexposure emerged on the fox's nose and also in areas on the ground at his feet.
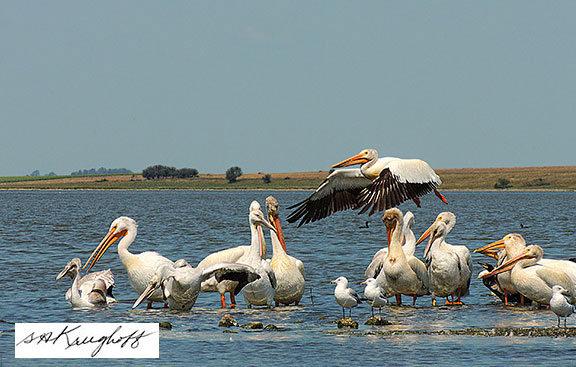
If you shoot at about 1/3 stop below what appears to be the optimum when in the field, over-exposures will be rare. On sunny days my camera is routinely set at minus 2/3 exposure compensation. For subjects like white pelicans it's often necessary to move to minus 1 or more to maintain detail in highlights.
Depth of field
In a photograph, depth of field is the portion of a scene that appears to be in focus. Understanding depth of field will allow you to control this aspect of your compositions.
Larger apertures (smaller F numbers) yield less depth of field—smaller apertures (larger F numbers) yield more depth of field. As you reduce the size of your camera’s aperture, less light reaches your film or digital sensor. In order to maintain the same shutter speed you will need to increase the ISO setting on your digital camera (or use higher speed film).
I have carefully chosen a digital camera that produces low-noise, well-saturated images up to ISO 800. This way I can use small apertures and maintain shutter speeds that are necessary to produce sharp images.
As one moves up the range of powerful telephoto lenses—there is less perceived depth of field in the images that are produced. This effect becomes dramatic at 300 mm and beyond. It is related to magnification, distance from the subject and flattened perspective.
In the past, I used large format film cameras. I routinely utilized an aperture setting of F64. Consequently I have not shied away from experimenting with small apertures on my digital SLRs. I regularly use apertures as small as F18 or F22, with my telephoto lenses.
In my opinion many articles that warn about the loss of resolution in fine detail at smaller apertures—exaggerate the effects of diffraction. I never make final judgments about the resolution of fine details displayed on my computer screen; comparisons are always made in prints.
I’m happy to sacrifice a degree of resolution in my subjects that is barely perceptible in prints—in order to have backgrounds and foregrounds appear sharper. Viewers of my photographs can enjoy a glimpse into the world in which the creatures live.
I encourage you to experiment with smaller apertures. The results may surprise and delight you!
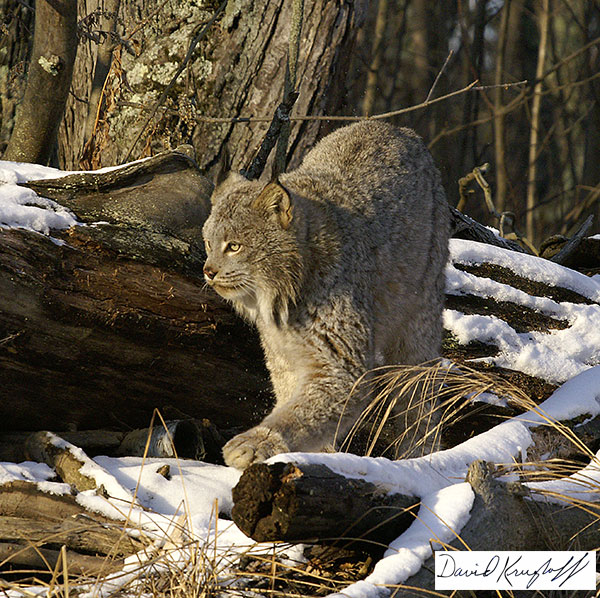
This photo of a Canadian Lynx demonstrates the effect of an aperture of F16 with a 500mm lens. This is possible with the aid of good quality image stabilization. Stabilization can be sensor based or built into the lens.
Focal point
Professional photographers carefully control the focal points of their images. This element is never left to chance.
A friend recently sent me an image of a great blue heron and her three chicks. At first glance, it seemed to be a magnificent composition; a once in a lifetime shot. The sun was behind the photographer. The downy chicks were all facing the camera, eyes wide open, and mother stood proudly just behind. But as I kept looking at the emailed image I felt uneasy. Something wasn’t right.
I opened the image in my editing software and zoomed in on the chicks. They were not in focus—but the leaves in front of them were sharp as a tack. My friend had inadvertently placed the auto-focus crosshair in his viewfinder on the leaves well ahead of the subjects; a hard lesson. It may be years before he has another opportunity like this.
Within the auto-focus menu of most high-end digital cameras, one can select a normal-sized single focus area or a small-sized single focus area. Some manuals or menus list this feature as a “focus area sensitivity adjustment”. I use the small focus area for my wildlife photography (except for birds in flight). This allows me to shoot through complex foregrounds and auto-focus on my subjects’ eyes. A larger focus area often picks up branches or leaves in the foreground, making it impossible to auto-focus on the subject behind them.
The smaller focus area is also more reliable for super telephoto work. At high magnifications it improves the ability to focus accurately on the eyes of distant wildlife.
If you’re a new photographer, please read about auto-focus lock in your digital camera’s manual. My cameras are set up to take advantage of this feature. When I press the shutter release button half-way-down, the camera focuses. The auto-focus remains locked as long as I maintain light pressure on the button. This lets me compose the photo while maintaining the same focal point. Once I align the composition I want in the viewfinder, I simply press the button all the way down to capture the image.
Ninety nine percent of the time, I rely on the central crosshair in my viewfinder when auto-focusing. Things happen fast in the field. When on the fly, selecting different crosshairs in the viewfinder is impractical. I highly recommend that photographers practice using a single central crosshair with focus lock. Adjusting the composition with the shutter held half-way-down becomes instinctive.
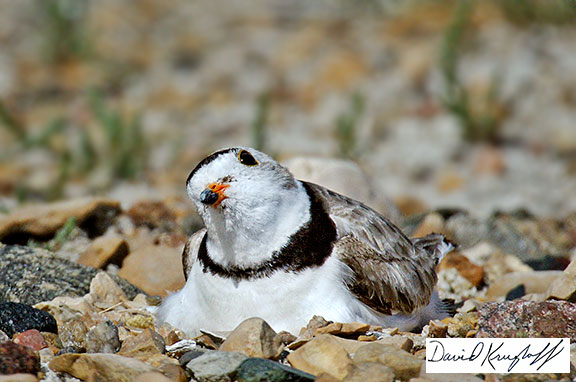
This image of this piping plover on his nest was taken with a 600mm lens. The focus point was placed on his face and the shutter pressed half-way to focus-lock. Then the camera was moved slightly to the right to complete the composition. A hawk was flying over head and I wanted to catch his upward glance. The window of opportunity was only a few seconds.
Developing photographs
Past photo tips have concentrated primarily on techniques and skills related to the camera. But in my opinion this represents only 50% of the process required to produce a great image. There are good reasons why master photographers such as Ansel Adams, personally developed and printed all of their images.
The fundamentals of photography have not changed. Skill and experience is required for the art of developing exposed film. Similar technical expertise is required when developing the information recorded on a memory card. Quick low cost development at a variety store is not likely to yield inspiring results.
Professional photographers develop their digital images in “ darkrooms” such as Adobe Photoshop and Lightroom or Mac’s Aperture. Talented software designers continue to produce powerful plug-ins that work in unison with these applications, streamlining processing.
When you print an image from your digital camera as-is, the camera’s engineers develop the image. Those engineers may not share your artistic sensibilities! The characteristics of the image represent only one of infinite possible interpretations of the exposure. Engineers must make subjective decisions when designing a camera’s image processor.
In the past, gray haired photographers like me used many different brands and types of film. Each film produced a different balance of saturation, color, contrast and resolution of detail. Every digital camera produces results that are as different as these films.
I believe that digital photography can now exceed film in its ability to represent realistically the dynamic range, color and complex nature of subjects. But to accomplish this one must be prepared to learn to use a digital darkroom.
Learning to use Photoshop Elements is an economical place to start. This software will allow you to adjust exposures, color balance, tonal contrast, saturation, brightness and global contrast. Images can be sharpened to improve the perception of fine detail. Areas of an image may be burned (darkened) or dodged (lightened), with more precision than when printing from film. Tutorials are available online or in print. Recent versions are user-friendly and intuitive.
Snapshots are great fun and have been part of every day life for generations. Modern digital cameras produce snap-shots that are often close to the quality of the work professionals produced during the film age.
But the bar has been raised for those that want to practice the art of still photography. Expectations for the qualities of still images have taken a quantum leap in the last few years. Images can be created that more closely represent one’s personal view of the world.
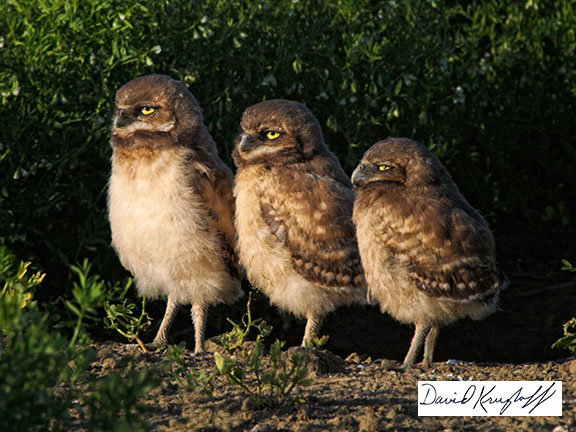
The burrowing owls below were photographed as the sun was setting. I had waited in a blind for several days for them to line up like stair steps.
Patience and wildlife photography
This column is the first in a series covering methods that I employ in the field. Patience and flexibility form the foundation of wildlife photography. The following anecdote will illustrate how these elements translate into practical application.
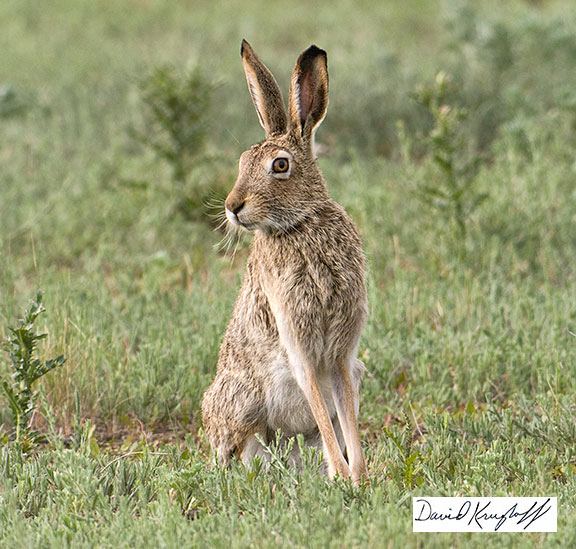
It’s early May and I’m searching for antelope near my home in Mortlach, Saskatchewan. Suddenly I spot a large group of white-tailed jack rabbits. Never have I seen such a gathering of this species.
While parking my Jeep I notice the sun is behind the rabbits. It will be impossible to capture detailed images with this backlighting. The rabbits are grazing a considerable distance south and to my right (west). There are no roads that will give me access from the south to facilitate getting the sun to my back.
It’s breeding season and the bucks are sparring as the group feeds. They seem to be drifting northwest. I quietly open the door of my jeep. Moments after my feet touch the ground most of the rabbits are nervously peering in my direction! I must stand perfectly still or the opportunity will evaporate.
Shy animals can often be approached indirectly by giving them the initial impression I’m moving away. So I plan to walk southeast about a third of a mile (primarily to my left away from the rabbits). Then I will move west. This will allow me to approach the rabbits from the south with the sun behind me. I cautiously begin to execute my plan. Each time the rabbits seem to be “on alert” I don’t move a muscle until they resume their activities.
Two hours have passed. I’m inching toward the rabbits from the south as I begin taking some photographs. They’re not aware of me. Suddenly the whole group begins moving toward me; running, jumping and celebrating as only jack rabbits can!
It’s necessary to quickly change the lens on my camera as the rabbits move closer. These are the moments that I live for! Finally at dusk, I reluctantly pack my gear to head home.
For me wildlife photography is like sailing. Every attempt to force nature or hurry directly toward my goal yields nothing. After “tacking” back and forth I reached my destination and was surrounded by rabbits with perfect lighting.
Preparing to work in the wilderness
First a quick reminder: It's not safe for inexperienced people to hike in wilderness areas without being accompanied by an experienced guide or companion.
Saskatchewan’s wilderness is teaming with life. When I decide to work in a particular area, I plan to stay for days, weeks or months at a time. This allows me to be in the field before dawn. I rarely return to my campsite before sunset. After several weeks, resident animals begin to accept me. I often follow fresh tracks or wait beside well-worn paths.
In addition, I have added a fundamental exercise to my routine when packing for work in the field. I deliberately abandon my sometimes overwrought and anxious mind, along with man’s complicated society. Consequently while in the wilderness, my senses are available to be filled with sights and sounds that would otherwise be completely beyond my reach. After a few days, I begin hearing sounds as subtle as leaves falling from the trees.
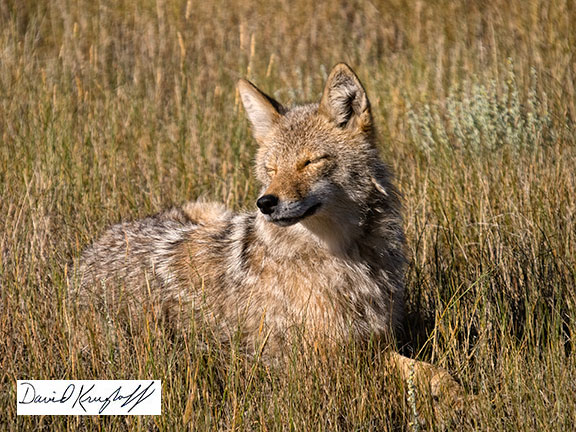
When I am calm and unhurried I move through wilderness areas differently. During August I encountered a young coyote while crossing an open field. We walked side by side for over a mile. We sat down together in the warm sun and he fell asleep! Man belongs in the natural world when we shed attitudes that do not.
This unhurried approach can also be utilized during one-day outings. But it’s vital to strictly limit the area of exploration.
For three weeks during August, I hosted a wildlife photographer from the United States. On the final day we visited the Last Mountain Lake Bird Sanctuary—near Simpson, Saskatchewan.
We spent the entire day hiking along the shoreline of one of the larger lakes. I insisted that we crawl flat on the ground each time we rounded a corner, opening to a fresh view of the lake.
As we emerged from yet another headland—thousands of sandhill cranes stood side-by-side as far as the eye could see!
My friend captured stunning close-ups of countless species. These included the American avocet, least sandpiper, pied billed grebe, double crested cormorant, lesser yellowlegs, American coot and of course sandhill crane.
Sightings of over 280 species of birds have been confirmed in this sanctuary during one season! Unfortunately many visitors hurriedly drive along the roadways and are lucky if they see any wildlife.
The number of species that can photographed in Saskatchewan’s vast wilderness areas really boils down to the time one is willing to spend there.
Teleconverters
From a technical standpoint, photographing mink is challenging—especially if one hopes to record their natural behaviors.
Often wildlife photographers are forced to rely on teleconverters in combination with the most powerful lenses they can obtain. A teleconverter (or converter) is a lens that can be mounted between the camera and the primary lens. Converters increase the focal length of the primary lens by the amount implied in their names.
Occasionally I resort to stacking two converters on my 800mm lens. A 2X converter with this lens yields 1600mm. By adding a 1.4X converter (1.4 times1600) I enjoy the advantages of a 2240mm lens!
Unfortunately the extra magnification comes at a cost. Less light passes through the stacked converters. This disables auto-focus and reduces shutter speeds.
Actual loss of sharpness and resolution when using high quality lenses and converters is minimal. Camera shake and atmospheric influences are the real culprits at these magnifications.
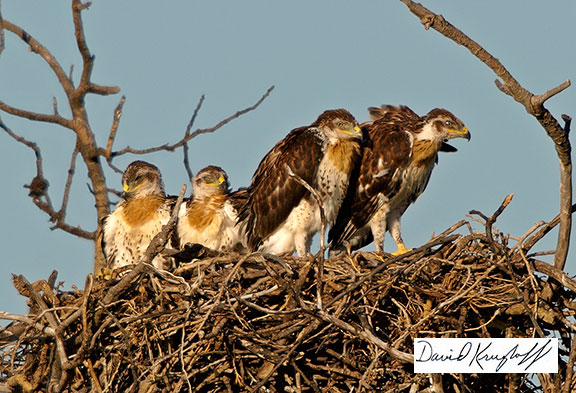
The accompanying photo of ferruginous hawks was shot at 2240mm. The lens was fully shaded inside a blind and supported by a heavy tripod. A 10-pound sandbag hung from the tripod, dampening subtle movements.
Shading the main element of a lens improves resolution of detail and contrast. Lens hoods are a feeble attempt to provide shade across the main element. It’s always better to intentionally shade the lens when working at extreme magnifications.
Another common “trick” when working at great distances is cropping of the final images. High-resolution images can be cropped dramatically, as much as 50%!
Finally, I depend on cameras with a variety of different design characteristics. I do not entertain zealous loyalty for any brand name. I look for unique features that will help me achieve my goals.
Early in 2008, I purchased a pro-sumer camera because of its 60-frame-per-second, full resolution capture rate. It also has a built in flash that enables me to shoot 7-frames-a-second for up to 20 images! I wish this camera had been in my hands four years ago. I was working in a black bear’s den and missed several magical moments, with flash delays.
Flexibility in selecting equipment along with experimentation, helps me share the precious beauty that I see in the world.
Managing color in digital images
Many photographers are not happy with the color expressed in images from their digital cameras.
Color was a huge issue for older photographers like me as we attempted to embrace digital photography. Most photographers had experimented and chosen films that pleased their artistic sensibilities.
Fuji Velvia 50 was the gold standard for many nature photographers. Sunsets are dramatic. Images are warm with pleasing contrast. During the film era photographers routinely used warming filters on their lenses. Fuji Velvia was not popular for photographing people because skin tones shifted too far toward red.
Fuji Velvia 50 was discontinued for a while in 2005. This event influenced the resumption of my experimentation with digital SLRs. I finally settled on a digital camera system that was durable, waterproof and provided resolution similar to 35 mm film. I had to learn how to coax the color I wanted, from this new technology.
Color is a casualty of the even the slightest degrees of overexposure. If warm, saturated colors are desired, it’s necessary to maintain exposure compensation settings well under the point where highlights are overexposed (minus settings). My experience suggests it’s far better to lean toward erring slightly on the underexposed side of the “perfect exposure”. Exposures can be increased precisely, as needed, with editing software.
As was the case with film, you will capture more vibrant colors from dawn through early morning and late afternoon to sunset. You may want to experiment with warming, UV or polarizing filters if you plan to work throughout the day.
I often use an 81A-warming filter, especially when photographing black bear on rainy days or in deep shade. This prevents the blue cast that may appear in digital images of black bear when photographed under these conditions. The camera’s white balance can be set to “shade” or a custom setting. But I find the warming filter to be more reliable. White balance of raw files can also be tweaked some more during final processing.
I believe that 50% of the quality of a digital image is determined at the moment of shutter release. The other half is determined during development.
If you hope to create images with vibrant colors and three-dimensional qualities – it’s imperative to master skills of the digital darkroom. I prefer to change all of the camera’s default enhancement settings to “zero or off”. In-camera noise reduction sacrifices fine detail. Choices ranging from subtle to dramatic can be made during processing. Tonal contrast, global contrast, sharpness, saturation and dynamic range can all be adjusted when developing your images with professional software.
Processing of digital images by discount service providers or at self-service kiosks is convenient for snapshots. But many photographers will most certainly be disappointed. If you don’t want to bother with processing, full service custom development and printing services are available. An experienced developer may be all that‘s needed to make your digital photographs “sing”.
Composition of digital images
Composition is often discussed in photo clubs and college courses. Participants consider “the rule of thirds” and other traditional guidelines. In many ways it’s like studying the manuscripts of musical compositions. Theories and rules of composition are a language used to describe elements of a photograph. But it’s important to remember; the human heart animated the photographs from which all theories originated.
Some composers of popular music had classical training. But at the other end of the spectrum, many learned to play “by ear”. They can’t read a note.
I’m not implying that traditional or contemporary theories of composition are a waste of time. Key fundamentals are shared freely at countless internet sites. If enthusiastic photographers practice specific elements of composition it can be helpful. They will gain control over the results that emerge from their cameras. Mastering the camera is exactly like learning to play a musical instrument.
For me the real magic begins when I'm able to successfully share the passion I feel for my subject. This requires that every technical aspect of the camera be controlled instinctively, including the balance of the composition within the viewfinder.
There are always new ways to view a subject. To the extent that theory blocks discovery of a fresh new approach, it can actually stifle creativity.
Theories of composition helped me learn to walk; occasionally I’m able to run.
Motivation for creative photography
Aspiring photographers as well as professionals experience similar excitement and enthusiasm after buying a new camera. But all too soon everything in life seems to conspire against our creative natures. Batteries don’t get charged after the last outing and equipment collects dust.
Thankfully artists living in Saskatchewan have an advantage. As our cruel winters yield to spring; we’re immersed in nature’s awakening. Our favorite birds begin to return, sometimes one by one, sometimes by the millions. All of nature is bursting with renewal and infinite possibilities. If we only take a few moments each day to appreciate the subtleties of this event, our cameras will no longer gather dust.
Spring is the perfect time to harness everything we’ve experienced in our lives, and begin working on that project we’ve always dreamed about.
My dream is not about working in Africa, China or Costa Rica. For years, I’ve had this nagging feeling that I should be working in “my own back yard”.
Naturalists have spotted 357 species of birds in Saskatchewan. This year, I’ve chosen to begin photographing them. I suspect this may take awhile!
If your passion is wildflowers, Saskatchewan is home to 127 families of flowering plants, 600 genera and 1625 species. It’s a daunting number. But unlike birds, at least they will stand still!
It’s all too easy for us to lose our way; but the natural world can lead us back to our child-like excitement and confidence. Photographers are reminded to point their cameras at breathtaking subjects. Then the illusive alchemy they’re seeking as an artist is effortlessly rediscovered. Motivation is no longer an issue.
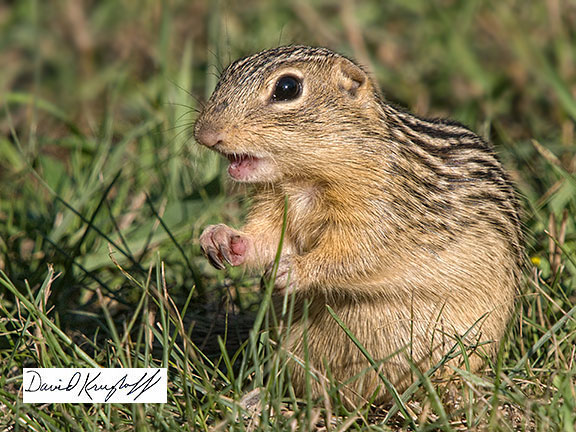
This tiny thirteen lined ground squirrel (below) emerged from her winter burrow a few days ago. She joyfully accepted some sunflower seeds as a treat.
Photographing subjects in motion
Attempting to capture high quality images of subjects in motion can be frustrating. It’s my hope the following suggestions will be helpful.
It may be necessary to consult your camera’s instruction manual to locate and change settings in the menus.
First of all it’s necessary to determine if your SLR body and lens combination is designed for high-speed focus. If not, results will fall short of professional standards. Fast focusing action lenses have large apertures of F2.8 to F4. Large apertures enable more light to reach your camera’s sensor.
Shutter speeds from 1/500th to 1/1000th of a second are required for consistent sharp results. I increase the ISO setting (digital film speed) as necessary to maintain or exceed these shutter speeds. With or without image stabilization, faster shutter speeds are always desirable. Blurring will begin to dominate as shutter speeds fall below 1/500th of a second.
For indoor events like dancing or children playing I rely on Single-AF (auto-focus) with shutter release priority turned OFF. This enables me to accurately select the subject or elements that will be in focus. The shutter will not release unless the subject is in focus! With shutter release priority turned ON, it’s possible to take an infinite number of shots and have none in focus.
I depend on Continuous-AF when animals like bears are running directly toward me or with birds in flight. But I always combine this with shutter release priority turned OFF. I do not want the shutter to release if the subject is not in focus.
Continuous AF combined with shutter release priority ON is the default setting on many digital SLRs. I understand this can be confusing.
In my opinion single AF or continuous AF with shutter release priority turned ON—is a feature designed for sports photographers. Not capturing an image of the game changing moment is simply not an option. It’s a disaster. A soft image is OK in a daily newspaper. Most readers wouldn’t even notice.
If you will practice after these simple menu settings are selected and maintain recommended shutter speeds your results will improve dramatically.
Note: Many inexpensive "point and shoot" digital cameras have a "sports setting". This feature often works surprisingly well with subjects in motion.
Which digital camera should I buy?
Visitors to our gallery regularly ask Sharie, “could your husband give me some advice about which camera to buy?” For me, with each passing year the answer becomes simpler.
I experimented with digital cameras beginning in the late 90s. But I was never happy with any of them until 2006. I finally believed my digital camera was helping me produce better work. Never again did I say, “I should have shot this on film!” Even my beloved large format cameras and lenses were abandoned.
Improvements in the quality of digital SLRs during each ensuing year have been immeasurable. Every popular manufacturer offers cameras far superior to my personal favorite of 2006.
I switched brands again in 2008, to make use of subtle features that are of little or no importance to new photographers. At some point experienced photographers settle on a particular brand because of what they perceive as small advantages. These advantages help them to achieve specific personal goals. For example, my work requires a camera that’s waterproof.
Professional cameras are presently of such high quality; they’re not going to impede anyone’s progress. Current equipment is helpful, but every photographer that’s inspired me shares fundamental traits. These are what really matter to me.
1 – They have an all-consuming passion for their subjects.
2 – There’s a clear vision of what they hope to achieve.
3 – These men and women are without exception, tireless workers.
4 – After countless hours of practice, selection of camera settings is instinctive, virtually automatic.
5 – Camera settings are made in concert with their knowledge of exactly what can be accomplished during development.
6 – The photographer is a skilled developer of digital files (or film). Or they depend on and have a close relationship with a skilled developer.
I encourage new photographers to relax and simply buy an affordable camera. Many entrance level SLRs share the same basic design elements with their more expensive cousins. Above all, have fun!
Controlling depth of field in photographs
Depth of field can be defined as the distance between objects in front of and behind the main subject that are perceived as being in focus. Using smaller apertures can increase this distance. To understand elements of a composition such as depth of field it’s necessary to view images sized to fit on your monitor. Proofs produced on an inexpensive dye ink printer are far better, enabling a tangible understanding of your compositions.
Every lens has a range of available apertures. It’ll be listed under specifications on the lens manufacturer’s website. The “wide-open” or largest aperture is also marked directly on each lens, for example F2.8. This indicates that unless a smaller aperture (larger F-number) is deliberately selected on your camera, the image will be captured at F2.8. Please refer to your camera’s manual to understand how to change aperture settings. My cameras are always used in “aperture priority mode”.
Expensive telephoto zoom lenses often have a single wide-open aperture throughout their zoom ranges. But one of my favorite lenses is an inexpensive 14 to 42mm zoom. It has a wide-open aperture range of F3.5 at 14mm to F5.6 at 42mm. Remember, smaller F-numbers indicate larger apertures; larger F-numbers indicate smaller apertures!
Here’s an easy way to learn about the effects of aperture sizes on perceived depth of field. Please choose a 50 to 100 mm lens with specifications from its wide-open aperture, through F22. If your lens or camera’s sensor is not image-stabilized, a tripod is required.
Focus on a fence post midway in a long line of posts, preferably a barbed wire fence. Capture one image at each available F-stop from wide-open through F22. As you begin to dramatically reduce aperture size, simply raise the ISO setting (digital film speed) of your camera. This will maintain adequate shutter speeds. I believe you’ll be amazed at what is possible!
Diffraction of light reduces sharpness as apertures are reduced in size. But one of the myths that have sprung from the digital age is the magnitude of this effect. I believe it’s a result of studying vastly magnified images on computer monitors. I urge you to make your own decisions about the actual real-world effects of diffraction.
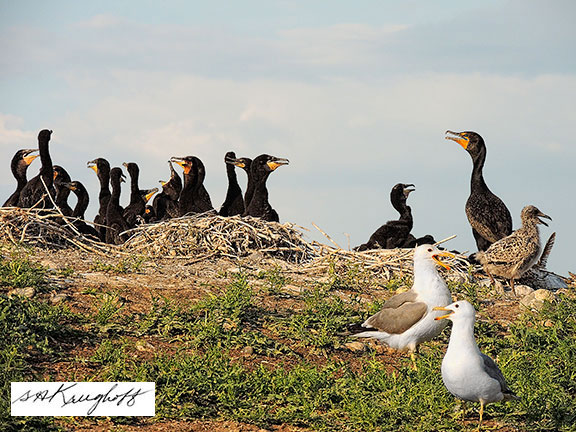
I regularly use F8 through F16 and occasionally use even smaller apertures on my digital SLRs. Sharie used F22 for the cormorants and gulls in the photo below. Apparent sharpness was produced throughout the images.
New digital cameras soon obsolete
All professional digital cameras are presently of such high quality; they’re not going to impede anyone’s progress. But I believe significant financial risks have emerged as a result of accelerating obsolescence.
As a gesture of respect for every photographer’s choices, I rarely mention brand names in my articles. But recent developments in digital technology compel me to make an exception.
I’ve utilized four different brands of professional DSLRs over the last 11 years. Early systems required investments of over $50,000. Losses of less than $5,000 for each transition were relatively painless. Those days are over.
My current DSLR and lenses will soon be obsolete. This has an eerie resemblance to my 1995 Dell 90 MHz Pentium notebook. This cutting edge computer including available options -- cost $8,400. Six years later it fetched $150 on eBay!
Early in 2005, my brother asked, “When are we going to quit buying converted film cameras?” He added, “We need digital systems that are designed from the ground up.” His wish is currently being answered, in spades.
Groundbreaking technology is fueling development of new compact cameras and interchangeable lenses. These systems have dramatically lower price points when compared to legacy systems. Like the Nikon F in 1959, these cameras are heralds of a new era.
The “Fuji X-Pro 1” was introduced in January of this year. At its heart is the revolutionary X-Trans CMOS sensor. Resolution of detail is stunning. Might this be a serious contender with Leica?
Olympus announced a shift in research and development. The majority will be concentrated on their compact interchangeable lens cameras. “Model E-PM1” is touted to have “the world’s fastest auto focus”. The optional 1.5 mega-pixel viewfinder is akin to a picture window! The body with a 14-42 mm lens retails for $449.
The first “Nikon 1 series” compact interchangeable lens cameras were released late in 2011. Nikon states, “Model V1, has the fastest AF and the most focus points in the world.” Is a continuous shooting rate of 10, 30 or 60 fps, fast enough for you? It has a bright high-resolution electronic viewfinder. An adaptor for legacy lenses is available.
Some models of the “Sony Alpha Nex” compact cameras have continuous shooting speeds of 10 fps. Resolution of 24.3 mega-pixels is available! An adaptor enabling the use of legacy lenses facilitates transitions from their established DSLRs.
The Panasonic “LUMIX® Compact System” is highly developed. My brother has relied on these cameras for several years.
“Canon’s G1X” is a fixed lens compact. It premiered at the 2012 International Consumer Electronics Show, in Las Vegas. Will models with interchangeable lenses follow?
I can hear my DSLRs trembling in their cozy Pelican case. They will soon have to share their home with a much smaller, lighter and faster cousin.
